
SIMPLE DIY FLOATING SHELVES
These are some floating shelves I made for our main bathroom. The bathroom is quite small, so any additional storage space is always nice. The shelves and supports are made out of some left over scrap pine wood I had laying around, but these are very inexpensive to buy at any home center. The wood was stained with a Minwax stain, then sealed with some polyurethane.
Here's a breakdown of the materials used:
1" x 4" Pine wood (or you can use any kind you'd like)
Quarter inch plywood
Screws

I started by making the support brackets for the shelves. The dimensions will vary based on how big you want to make your shelves, but I built inner supports that allow the actual shelves to slide over like a sleeve. Each support comprises of a long back piece, connected by 3 protruding supports.
The back piece is 24.5" x 2" x 1.75"
Each support piece is 5.75" x 2" x 1.75"

Here I cut out the shelf faces and side pieces.
The front face piece is 26" x 2.25"
The side pieces are 8.5" x 2.25"

For the top and bottom pieces of the shelves, I used a quarter inch sheet of plywood and affixed it to the faces of the shelves using pocket screws with a Kreg Jig. This is optional but gives it a cleaner look to hide the screws. You can also use glue and a brad nailer to nail it from the face fronts. You would just have to cover up the nail holes with wood filler and sand it smooth.
The plywood piece is cut to 24.5" x 7.75"

I sanded the shelves smooth starting with 150 grit sand paper, then finished with 220 grit. After wiping off the excess dust, I stained it with Minwax Early American stain. I really love this color as it's not too dark and gives a warm glow. Just wipe on, wait 5-10 minutes, then wipe off the excess.

Then I sealed it with some polyurethane. 2 coats of sealer was enough since the shelves are not a "high traffic" area.

The mounts were attached to the wall using some wall anchors. It would be best to drill directly into the wall studs, but if you can't, then wall anchors will work perfectly fine. I don't plan to store anything too heavy on the shelves so I'm not concern with it's strength.

Once the mounts are secured into place, the shelves just simply slide over the mounts and should fit snuggly.

I pushed the shelves back until it sit flush with the wall, then drove one screw into the top that goes into the mounts to securely hold it in place.
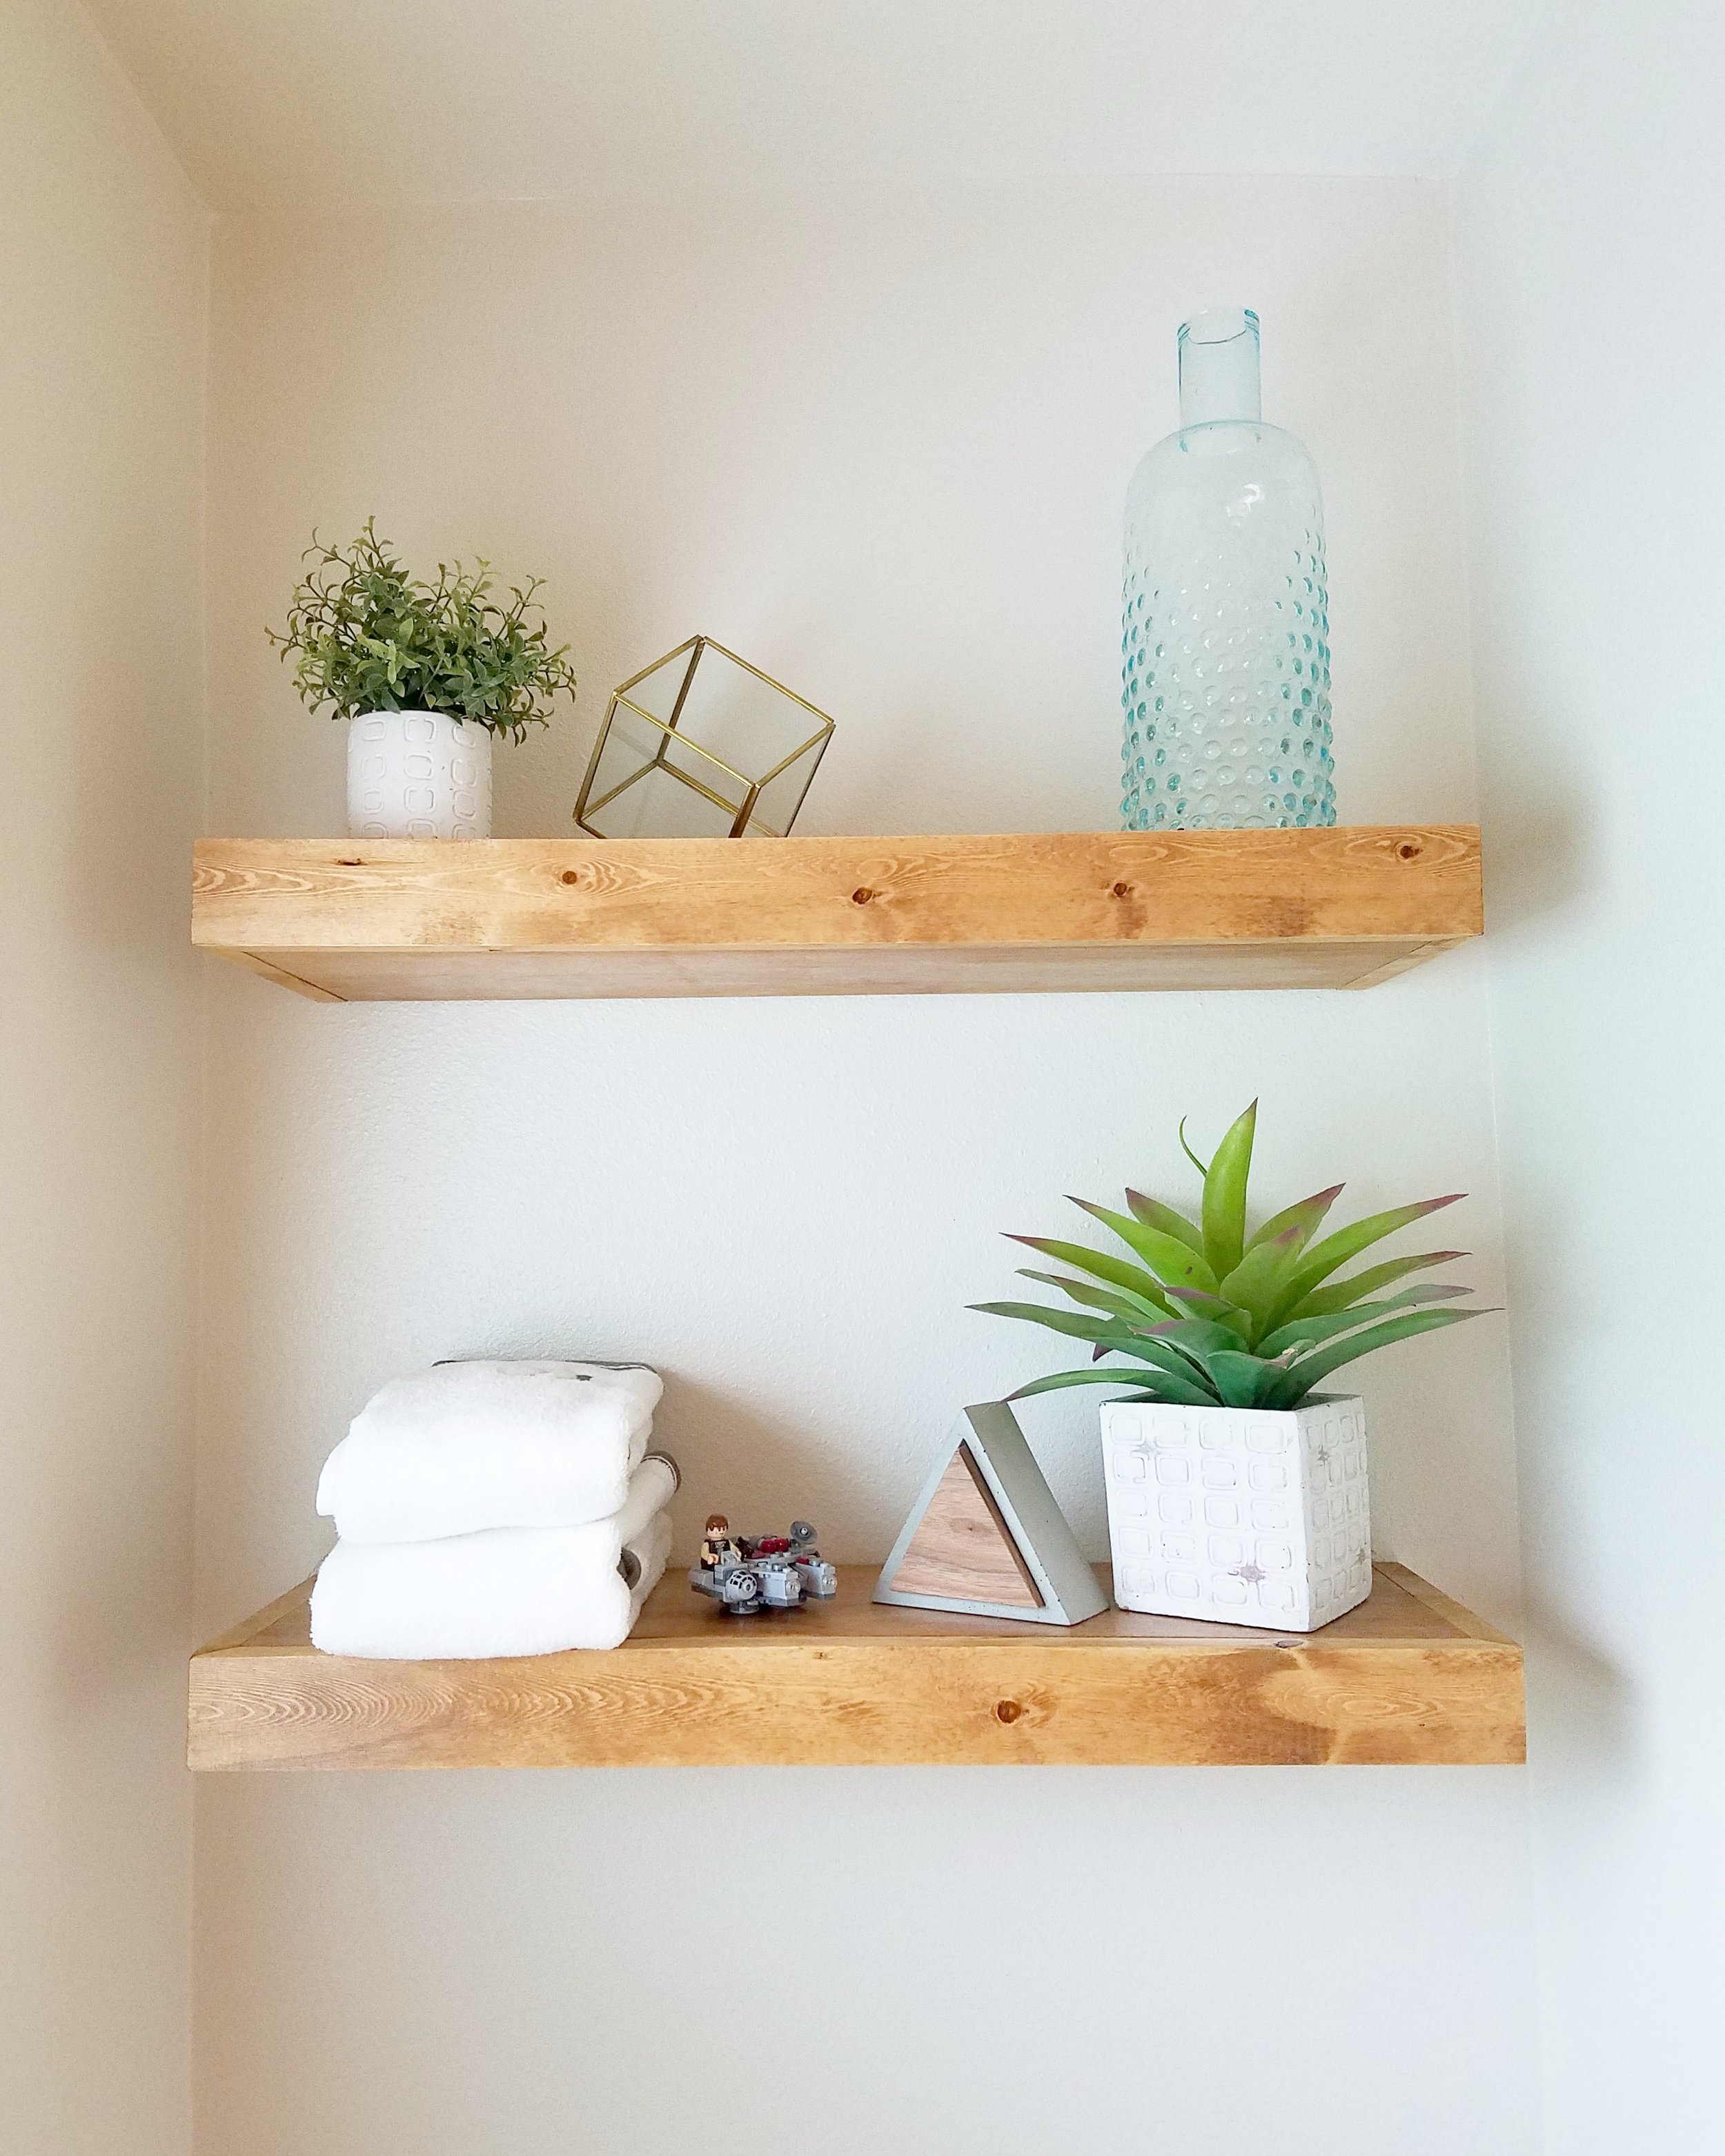
All done and ready for storage or decor!


